Following up on the last podcast where I talked about getting the soil ready and improving it over the years, I want to touch on what it takes to start plants indoors. The goal is to get them large enough and healthy enough to plant out in the garden when the ground temperature has reached the proper level.
The first step is calculating when to start them. Some plants require six weeks of growth and others eight weeks or more. For instance, tomatoes and peppers are on the eight weeks side of that calculation and summer squash and melons hang around closer to the six weeks mark. If want to venture into celery, that may require as many as 12 weeks of indoor growth along with repotting and so on. Perhaps save that for after you have a year or two of success with other plants. I do recommend getting to the point of growing your own celery. It’s not commonly grown but it is so good. That tasteless stuff purchased from your local grocery store will fall by the wayside once you know how to grow your own.
To recap, read the descriptions on what you plan to grow. They will clearly state how many weeks ahead of last frost date to start your plants. Last frost date is determined by where you live in the US. It is divided into “zones” with zone one being the farthest north and zone 8 and 9 are way down in Florida. Here in southwestern Virginia, we are in Zone 7A. Just a few miles from us, the elevation is significantly higher and those living up the mountain are firmly in Zone 6. For Zone 7, the last frost date is April 15th. For Zone 6, I believe it is May 1st. Not sure on that as it is not my zone. Look up USDA planting zones to find out where you fall in the schemes of things.
USDA Zones
Once you have your USDA zone identified, you have your first and last frost dates. And let me be clear on this. When they say last and/or first frost dates, what they are referring to is the approximate date when the chance of frost is 50%. You can have a last frost after the official date, which can be devastating to whatever you have already planted outside. Same for first frost date in the fall. You can have plants still out in the garden that you hope to harvest before the first frost comes. It can come earlier than expected and ruin your fall harvest.
Now that you have all of that straight, you will count back from your last frost date the number of weeks recommended to grow your indoor seedlings. I usually transplant my tomatoes out into the garden two weeks after the expected last frost date. That is around the 1st week of May. I count back eight weeks from the first of May and that will be when I want my tomato plants to be started. Check your package instructions. No matter the plant, it is generally clearly stated when is the best time to plant outside and how many weeks to grow the plants indoors prior to transplanting outside. Post on Locals if you have questions.
Seed Starting Mix
Purchase good organic seed starting mix. There are all kinds of bags of potting mix and planting mix and garden soil and so on at your local Big Box stores and even more choices on line. You are looking specifically for “seed starting mix”. Jiffy and Miracle Grow are popular organic brands. There are others. Just make sure it is seed starting mix.
Decide how many tomato, pepper, lettuce, squash, etc plants that you plan on growing in your garden. I try to start that many seeds for each item plus 25%. So, if I want four tomato plants, I start five or maybe even six. It’s nature. Not all seeds will sprout and some plants may be obviously weak. Strong plants are important. Once you know how many of each plant you intend to start from seed, you will have a better idea of how many containers you need.
Filling Containers
For planting containers, I use the 6-cell seed starting trays. They are about an inch and a half square and about two inches deep. It is beneficial to also have purchased plant trays that hold the 6-cell containers. These all come in standard sizes. The standard tray will hold 12 of the 6-cell containers. That’s 72 plants in one tray. There are other sizes of pots you can buy, but this is my choice for starting from seed. Once the seeds have reached a larger size, I transplant them into 2” x 2” containers. Each of the standard sized trays will hold 32 of the 2” x 2” pots. Additionally, you will want those clear plastic covers. Sometimes they come with the tray and sometimes you need to purchase them separately. You will need them.
You have a couple of choices about filling your containers. There is the option to fill each cell with dry mix and add water or another option is to wet the seed starting mix first and fill the cells with damp soil. I’ll leave that to you. I like to fill it dry and add water after. In either case, give yourself time to do this right. It takes some time for the seed starting mix to absorb the water. You want it just damp enough to clump together but not soggy. When wetting it ahead of time, don’t get in a hurry. Add a good amount of water and wait for it to incorporate fully before adding more. Keep it up until you reach the consistency you desire. If adding water after the fact, I use a two-step method. I wet from the top and then add water to the tray. The dry mix will pull the water up from the bottom. You’ll want to get good at adding water to the tray. It is the preferred method of adding water once your plants have sprouted. More on that later.
Planting the Seeds
Once you have the soil in the containers and dampened, you are ready to add the seeds. Many seeds are tiny and it is hard to get just one or two in the cell. Don’t worry about it. If you have several that sprout, you can thin them out by pulling the weakest sprouts out and focusing on the strongest for each cell. Tiny seeds can be laid on the surface and then sprinkled with a little dry soil. With a spray-mister you can dampen this additional layer after you have filled all the trays. I plant larger seeds by making an indentation in the seed mix with a pencil or small stick, placing the seed or seeds and gently moving the dampened soil over the seed.
The rule of thumb is that seeds are planted at a depth equal to their diameter. Lettuce seeds are laid on top of the soil. I use the pencil idea for tomatoes and peppers. Cilantro is planted a little deeper as the seed is even larger than the tomato seed. Each seed has just enough energy within it to push above the soil and begin to get sunlight. If a seed is planted too deep, it will run out of energy before reaching the surface. If planted too shallow, its roots may not get a good grip on the soil which makes a weak plant. Planting too deep has always been a bigger problem for me. I can always add soil if a seed sprouts on the surface.
Cover, Wait, then Fertilize
Once you have all of your precious seeds nestled into the potting mix, you will want to cover that tray with the plastic cover. This keeps the moisture high. Now we wait. I’ve had seeds sprout within days that the package said would take 7 to 10 days. You just never know. Check daily. Some seeds require 2 weeks or more to sprout. Do not give up too early. Once the seeds sprout, take the plastic covers off. You want to let the air circulate. Molds can kill off your seedlings overnight.
Once your seedlings have their first set of real leaves, it’s time to fertilize. There is usually a pair of initial leaves that sprout. They are generally roundish. After a day or two, a second set of leave will sprout that are usually shaped differently, more in line with a full-grown leaf of the plant. Look for leaves three and four coming up out of the center. You will see what I mean. To fertilize, I use fish emulsion in a spray mister. My particular mister model has a stream setting. I mix the fish emulsion and spray right at the base of the stem. Just one or two squirts is plenty. This fertilization is important at this stage. Do not leave out this step.
Light and Water
Now you are cooking. Keep lights on your plants 12 to 14 hours. Water about once per week. Don’t let the seeding starting mix completely dry out. Don’t make it too wet. Remember the mold. I like to water from the bottom as it encourages the roots to reach down for the water. It’s also easier than trying to spray-mist those delicate seedlings when they first sprout. It’s so easy to just drown them with even the smallest of squirts.
Okay, that will get you started. I’m going to put together a more comprehensive list of materials and such to help with the planning stages as this was more focused on the actual planting. You will find that information at peacefulheartfarm.locals.com.
Final Thoughts
And we are done for this podcast. I still have lots more updates on the homestead to share. I hope you enjoyed the update on the livestock guardian dogs. I never thought I would love dogs so much. But I truly enjoy these wonderful animals. I was so worried I would be a really bad dog owner, not knowing anything about raising dogs. As per our usual, we read a lot, asked lots of questions and found that it was not as hard as I thought. Oh, for sure, there are challenges we are facing, but I feel up to the task. The vet has helped tremendously. I can always ask the expert if I ever have any doubts.
It's not quite time to get started with the garden yet, and I hope this podcast topic is just in time to get you in the mood for the planning parts. We will start around the end of March, perhaps a little earlier. We shall see. It all depends on what I decide on for the garden this year.
I hope you will check out our Locals page. Again, that’s peacefulheartfarm.locals.com. You can support us there either financially or just by visiting us and sharing this post on your social media pages.
If you enjoyed this podcast, please, SUBSCRIBE on your favorite platform and remember to give us a 5-star rating and review. Reviews are important to expand our reach. If you like this content and want to help out the show, the absolute best way you can do that is to share it with any friends or family who might be interested in this type of content. Let them know about the Peaceful Heart Farmcast.
Thank you so much for stopping by the homestead and until next time, may God fill your life with grace and peace.
Spring grass, "Yahoo! they moo." Livestock chores or was known as "husbandry". I have moved all the animals around in the past few days. These are the Big Girls. 3 are being milked currently.
They are heading along the travel lane into the paddock #1. We have 14 paddocks or small field sections. The Big Boys are in the back paddocks with the last half round bale of hay. The small animals (goats, sheep, calves) are in a middle paddock with the LGDs for protection from predators... this is actually important; ask me how I know (think coyotes). There are 2 older calves from last Spring who are cycling (going into heat) AND we do not want them bred, too young, even if fertile. Also, the 2 bulls (older & younger) need to be kept away from the recent birth Mom, Princess. She will come back into 'heat soon; it's been about 5 weeks since her beautiful heifer, Katie, arrived. We don't want this new Mom bred back yet either.
Full transcript available on our website or in our members area here on Locals
Hey there! We’re Melanie and Scott, owners of Peaceful Heart Farm in beautiful Claudville. That’s in Patrick County Virginia, nestled between Winston-Salem, NC and Roanoke, VA.
In an age where most people only have access to bland food from industrial agriculture, we’re proud to call ourselves your local farmers. We milk the cows ourselves, make cheese by hand, produce nutrient-dense food and heal the earth. And we create food that has a real sense of terroir…that local taste that can only be created from our rich southern Virginia soils and forages.
We’re proud to serve Southwestern Virginia (Galax, Hillsville, Independence, Roanoke, Stuart and Wytheville, VA and surrounding towns). In North Carolina, we also serve Mount Airy and the Piedmont Triad (Winston-Salem, Greensboro and High Point, NC) with fresh raw milk dairy products.
I'll be adding in here many updates that have been on Facebook all along, just so much time in a day. Talk and show more soon.
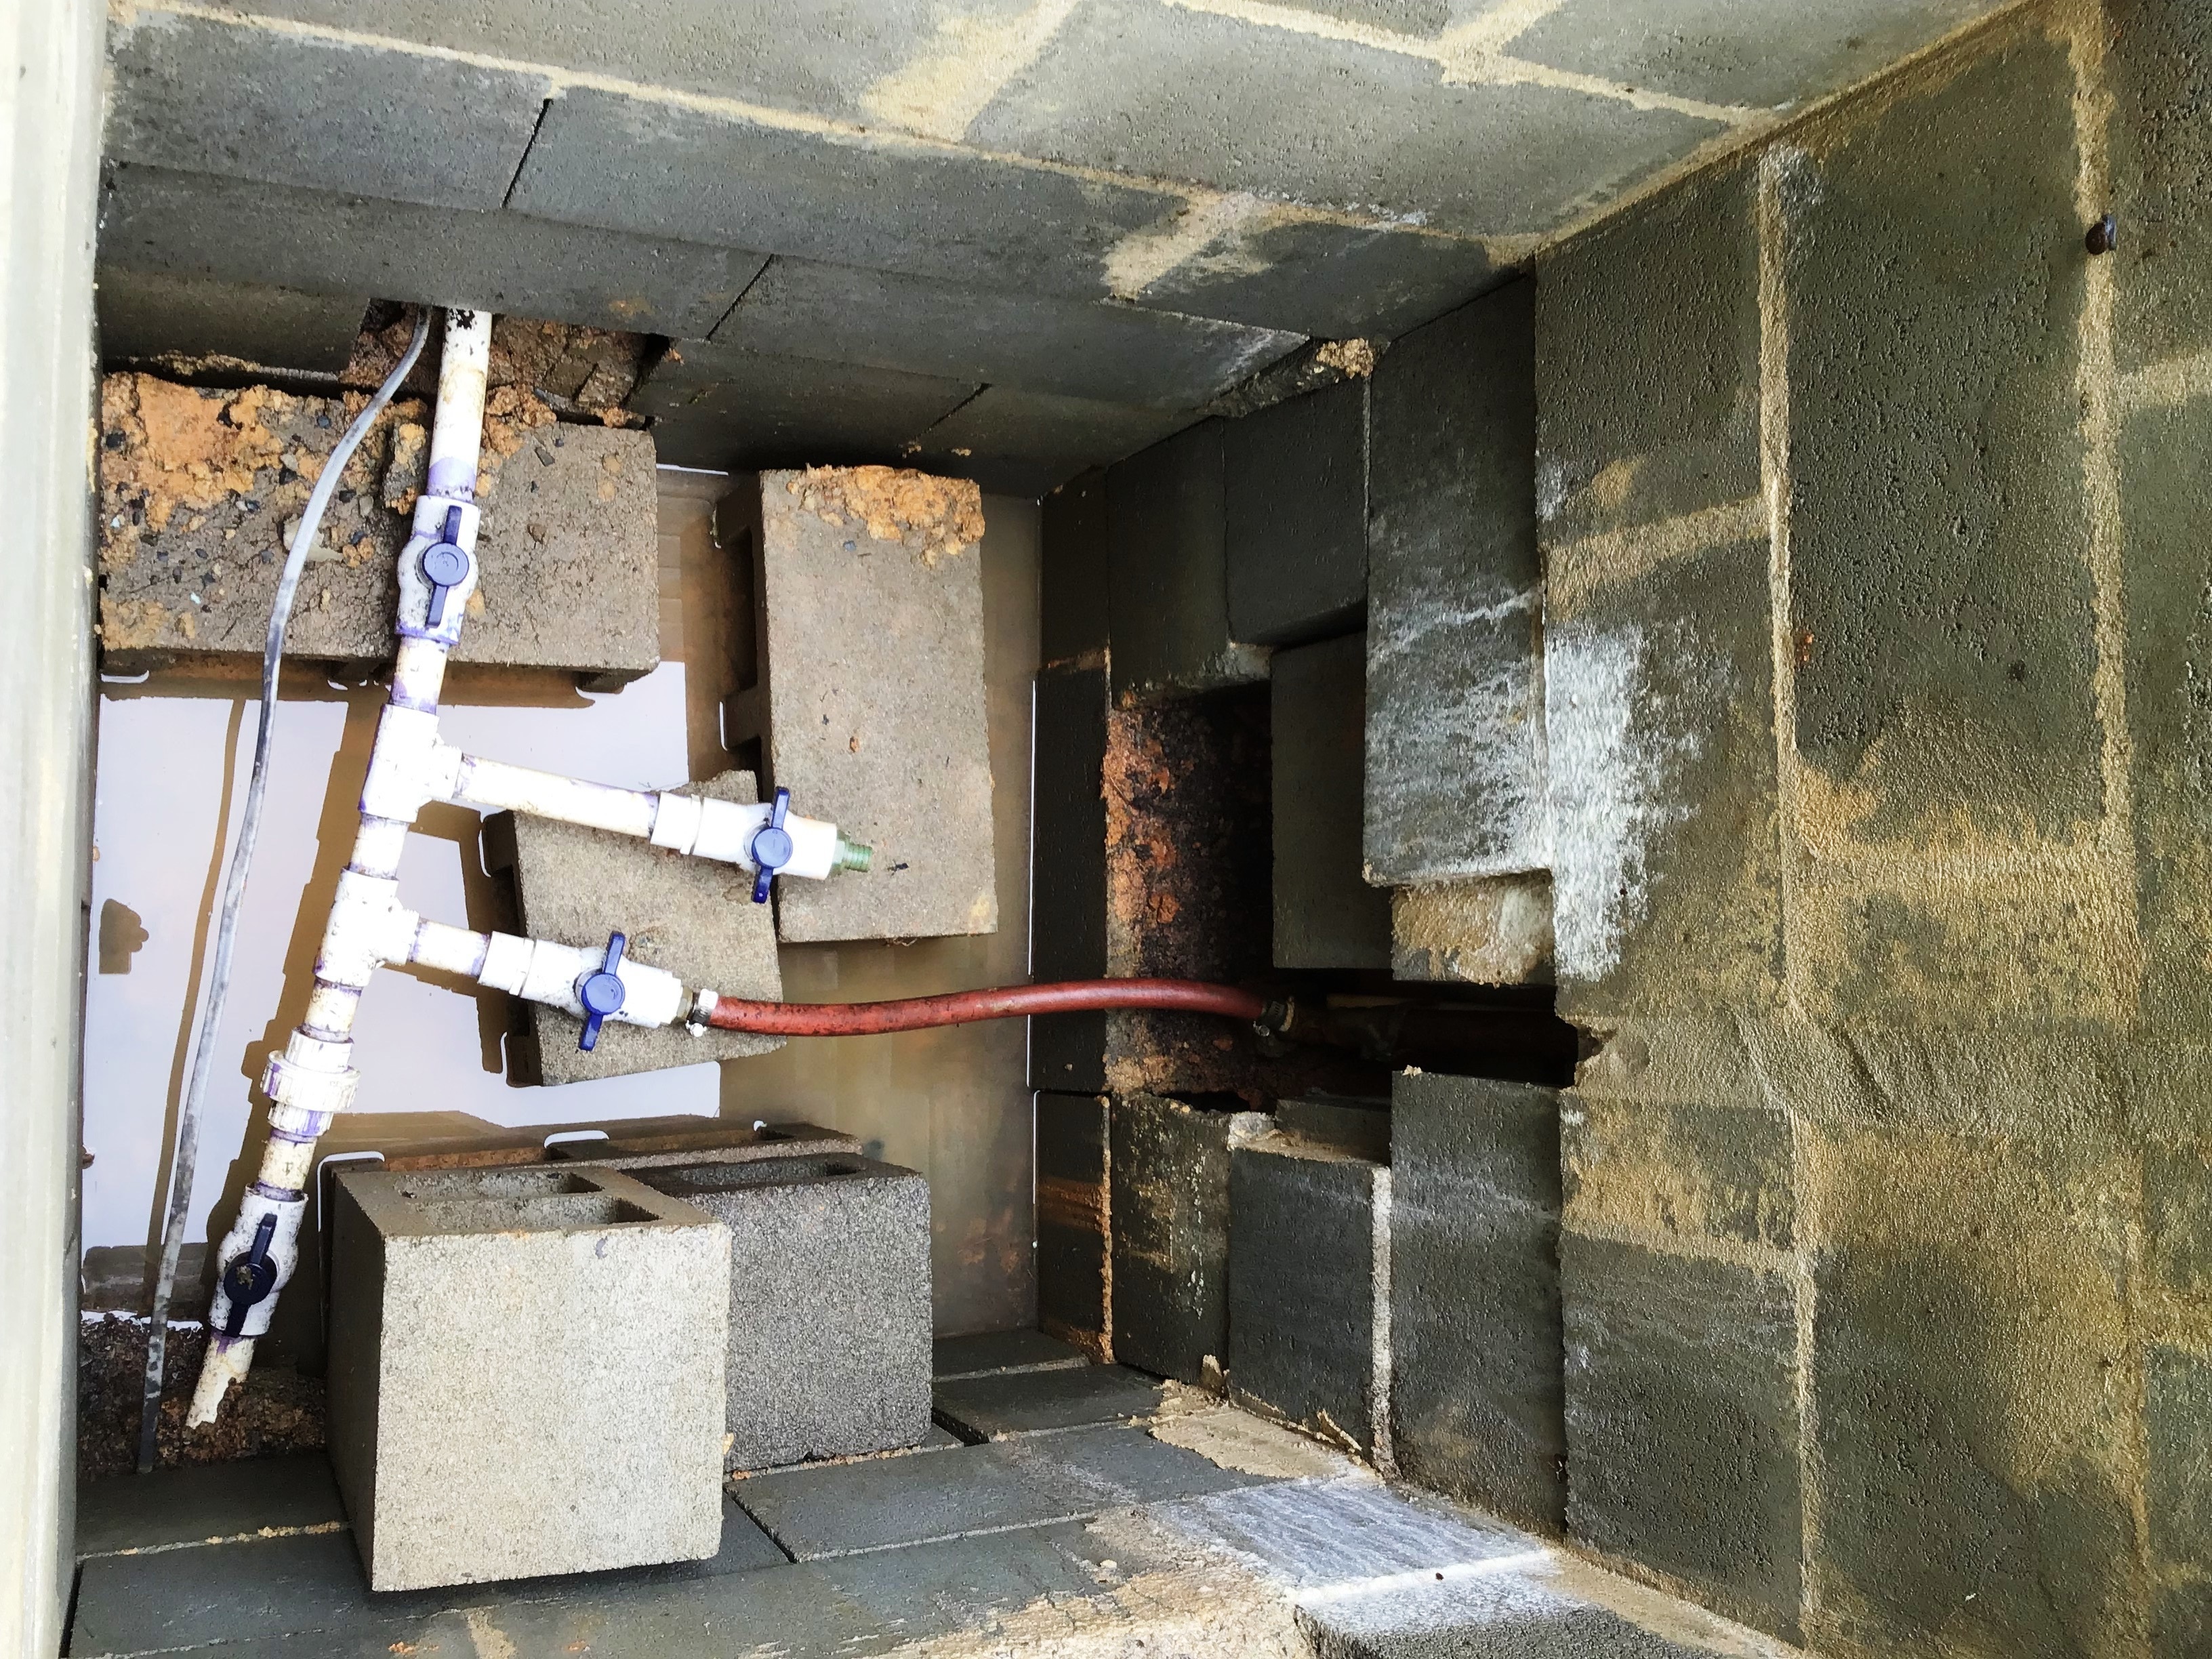
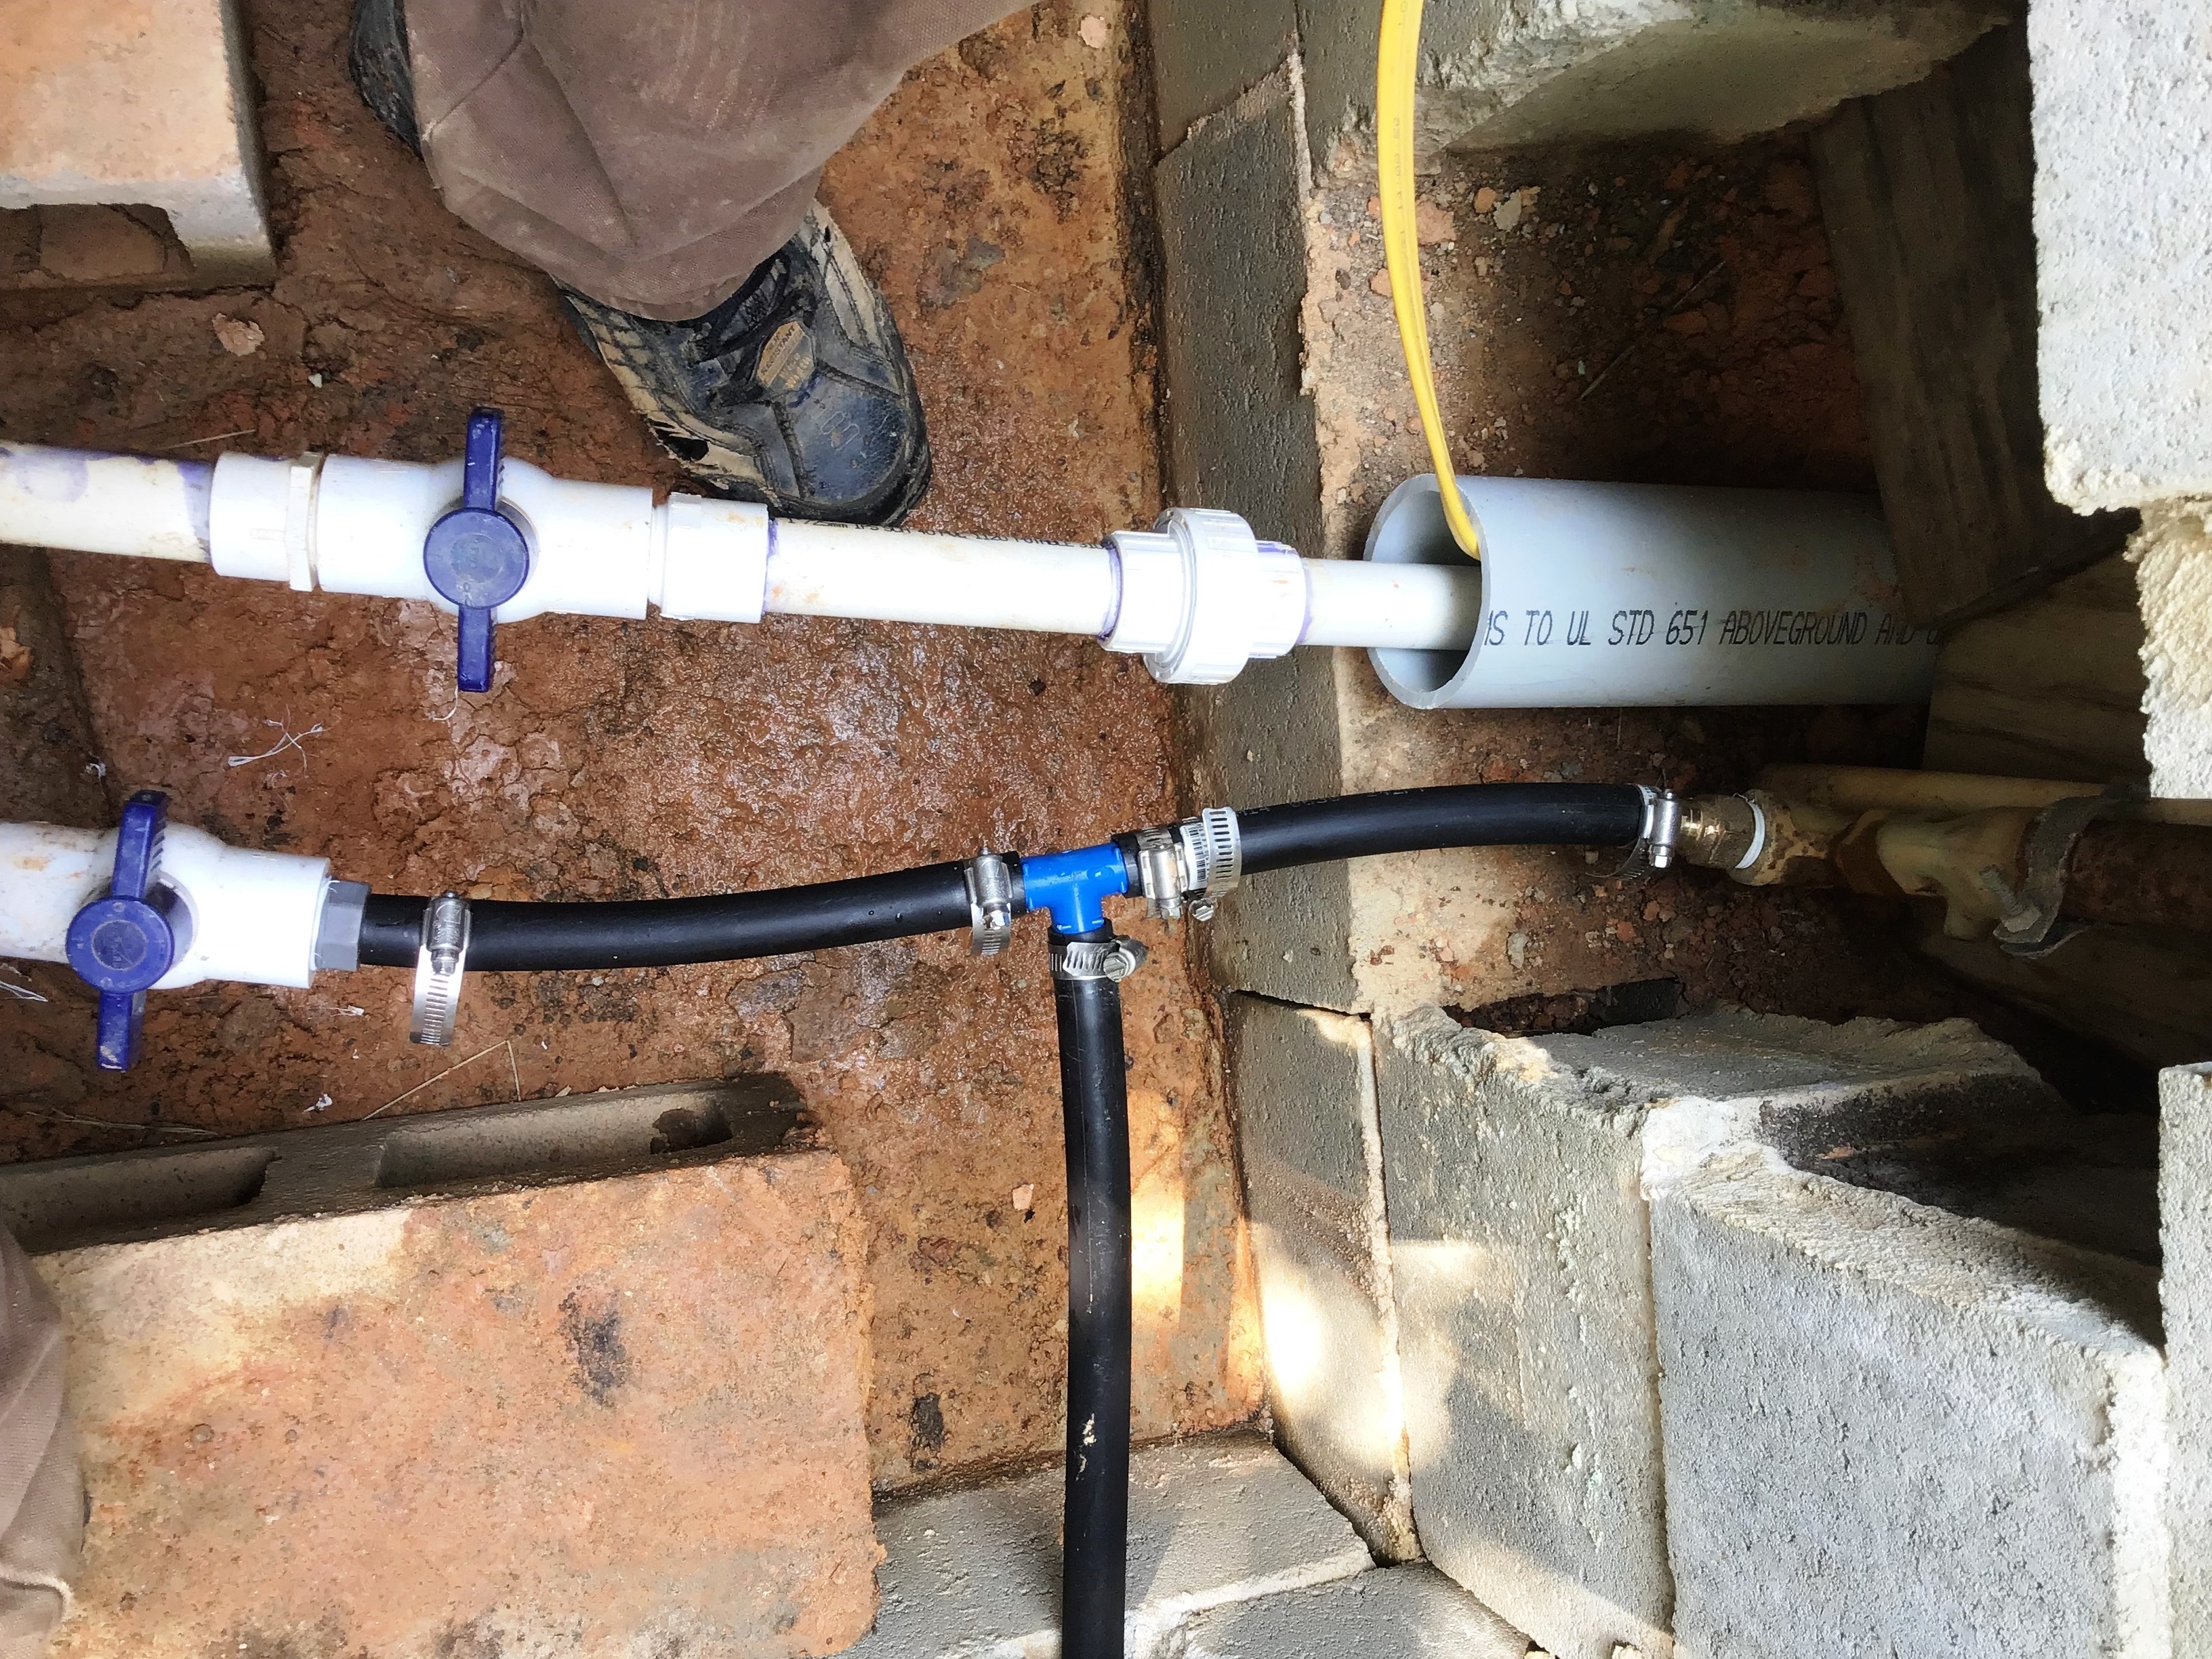
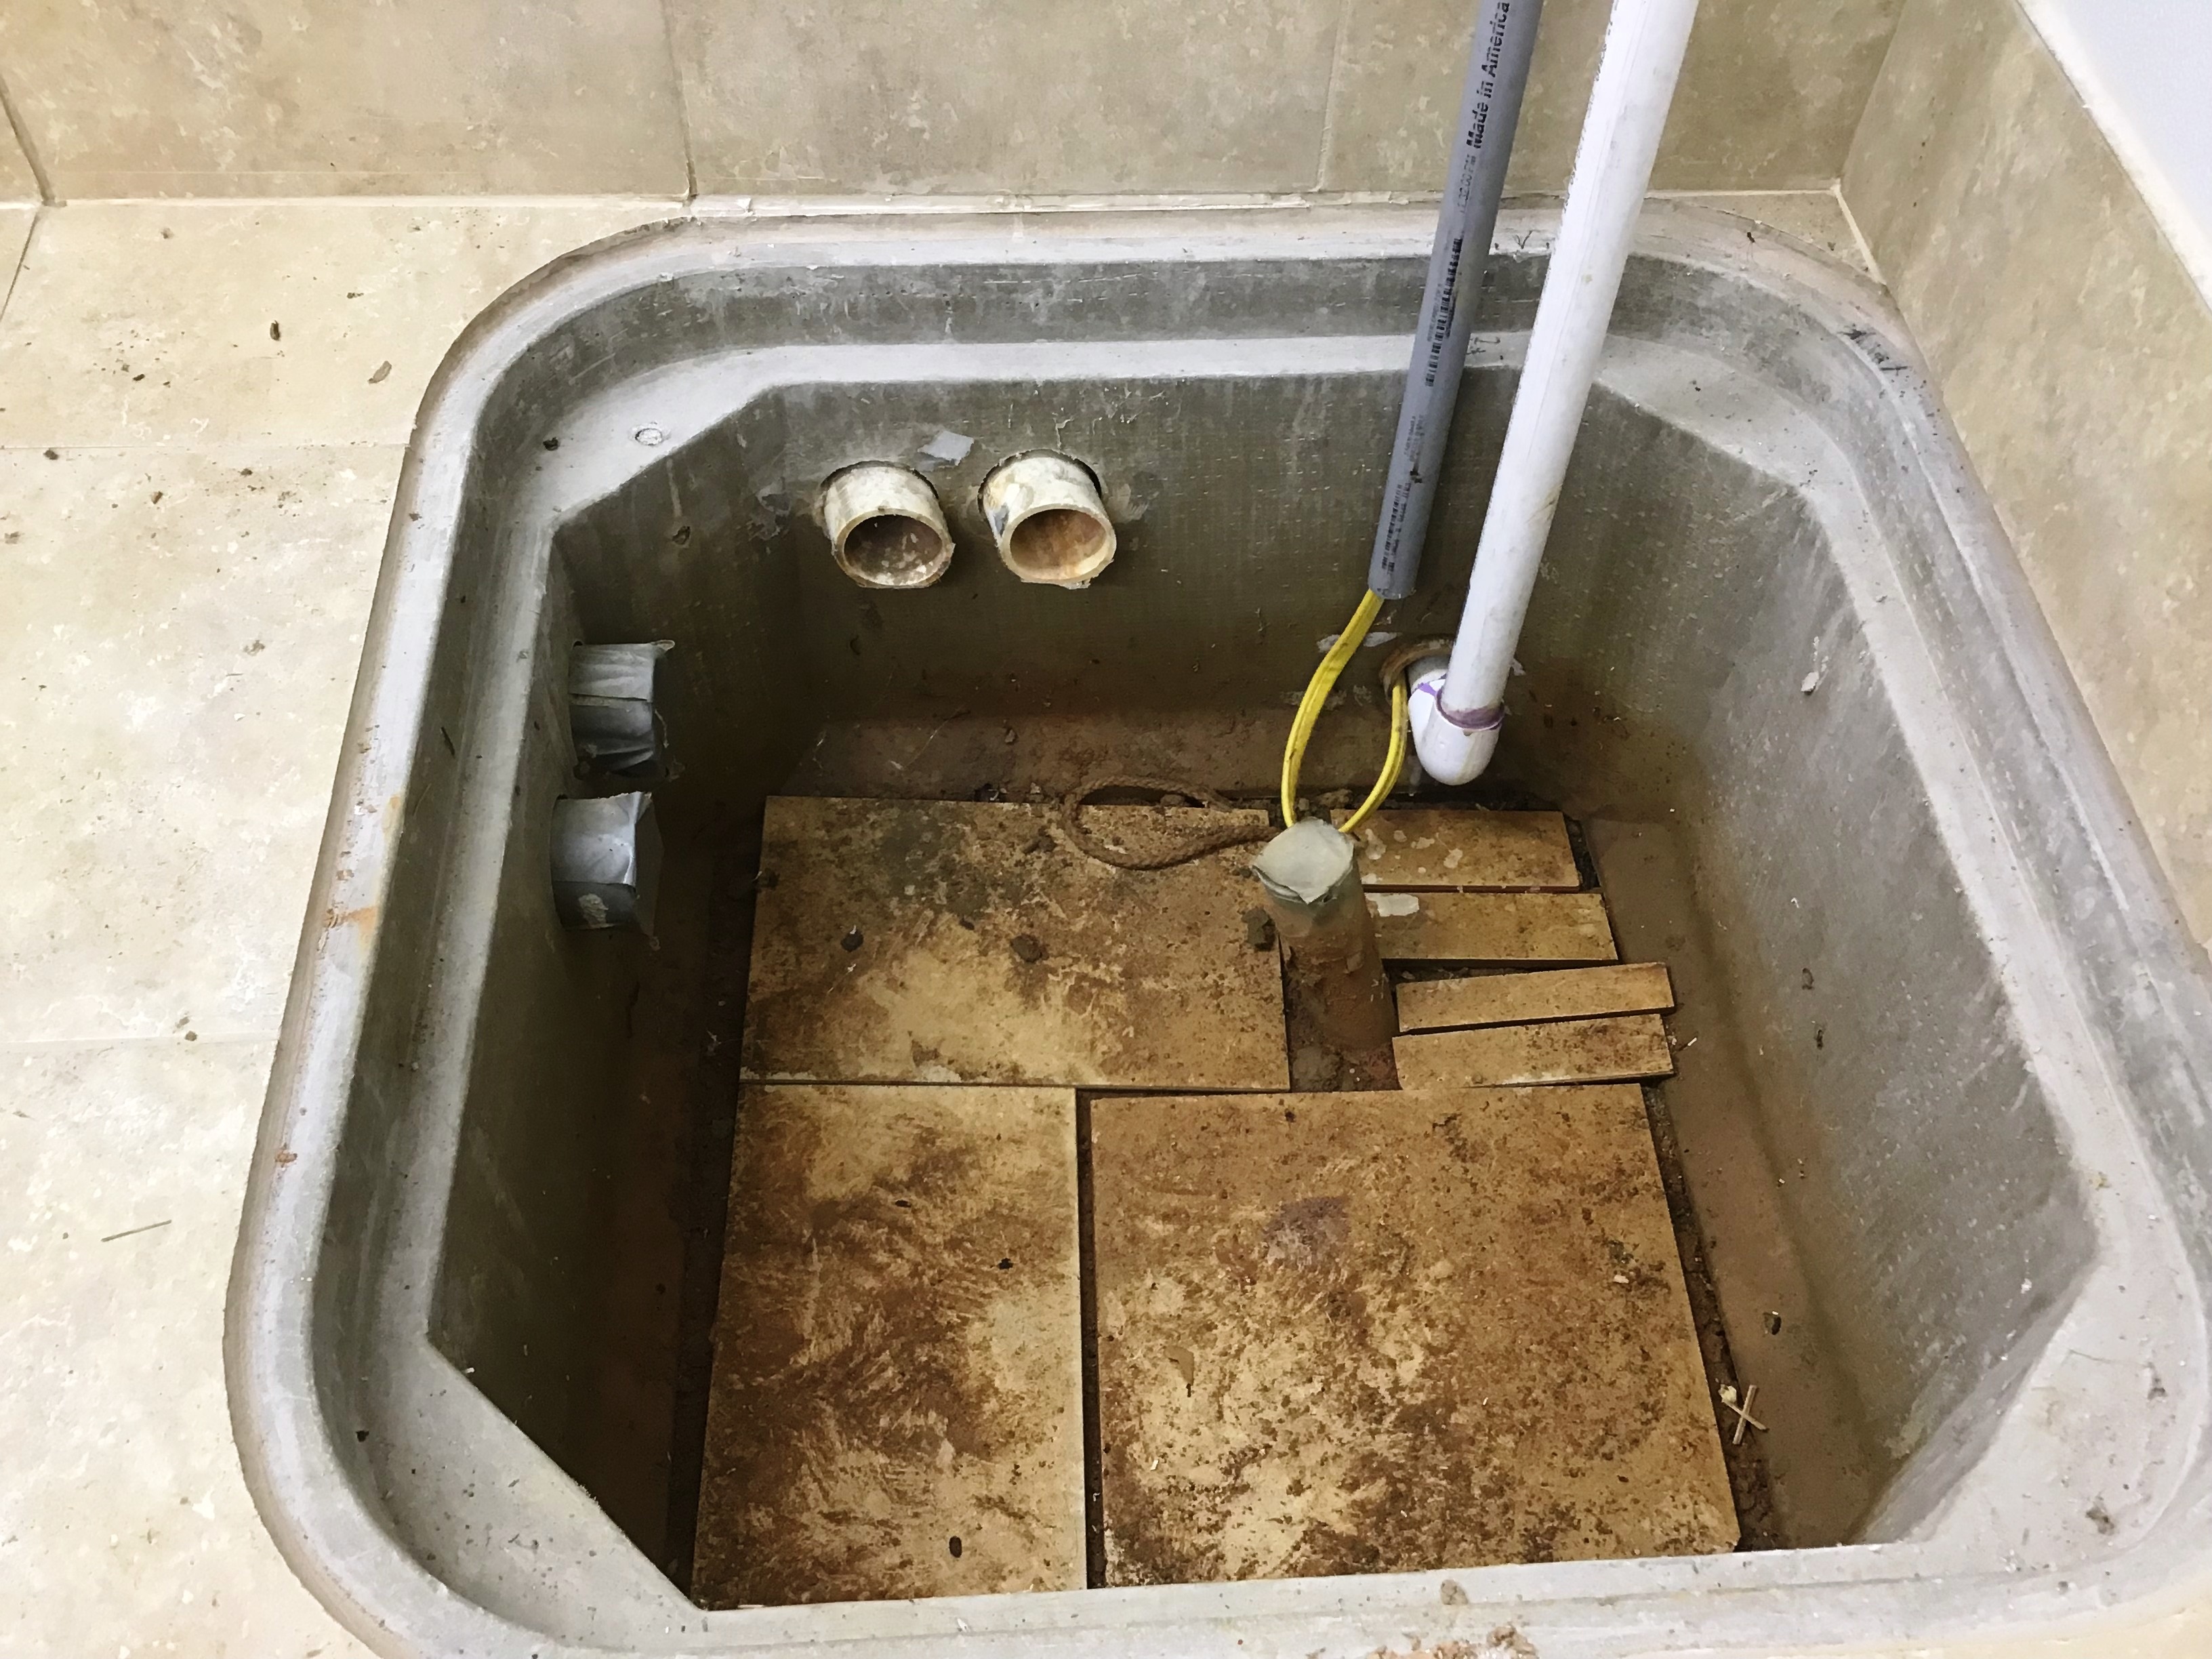
1st, I'm not a plumber, yet I can learn. 2nd, we are looking down into a concrete box which houses the well's water supply to all areas. When it is closed & covered it will not freeze in Winter. This was installed a few years ago. And recently was improved for the new creamery building & fresh clean water for our livestock. The room corner has a pull box; the white 1" PVC pipe started in the manhole outside and passes thru the milkroom here. The yellow electrical wire will takeover powering controlling the well pump from the new pressure tank in the attic.